
What you’ll need
- A live patient page (trial or subscription).
- An office printer, or the printed welcome kit Smyly ships to you.
Screens shown with a fictional demo practice and AI-generated model photos.
-
Step 1: Find your QR code on the dashboard
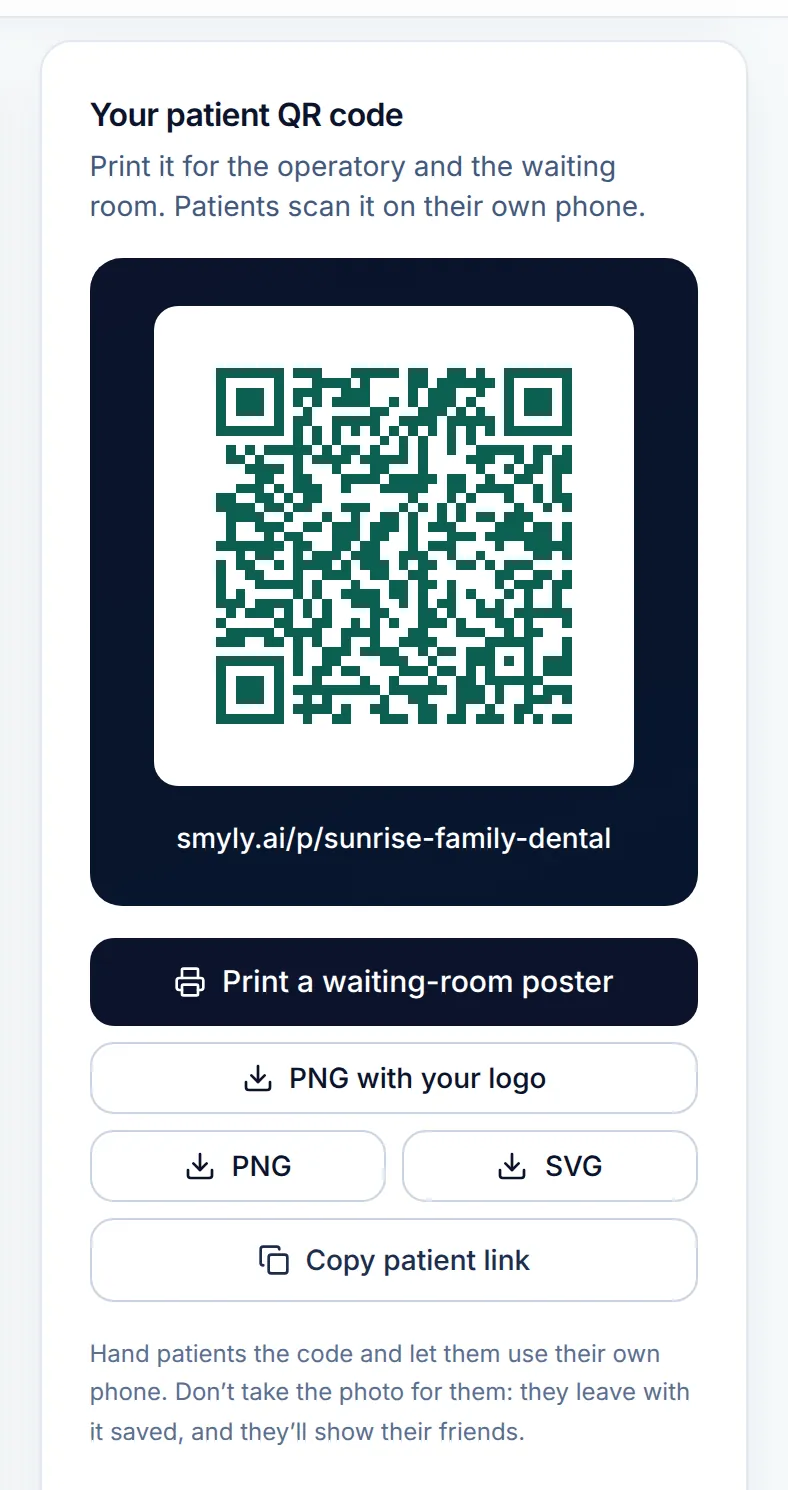
Open your Dashboard and scroll to Your patient QR code. The main button, Print a waiting-room poster, is the fastest way to a finished sign.
For your own designs, download PNG with your logo (it appears once you have uploaded a logo), a plain PNG, or an SVG for a print shop. Copy patient link copies smyly.ai/p/your-practice.
-
Step 2: Print the waiting-room poster
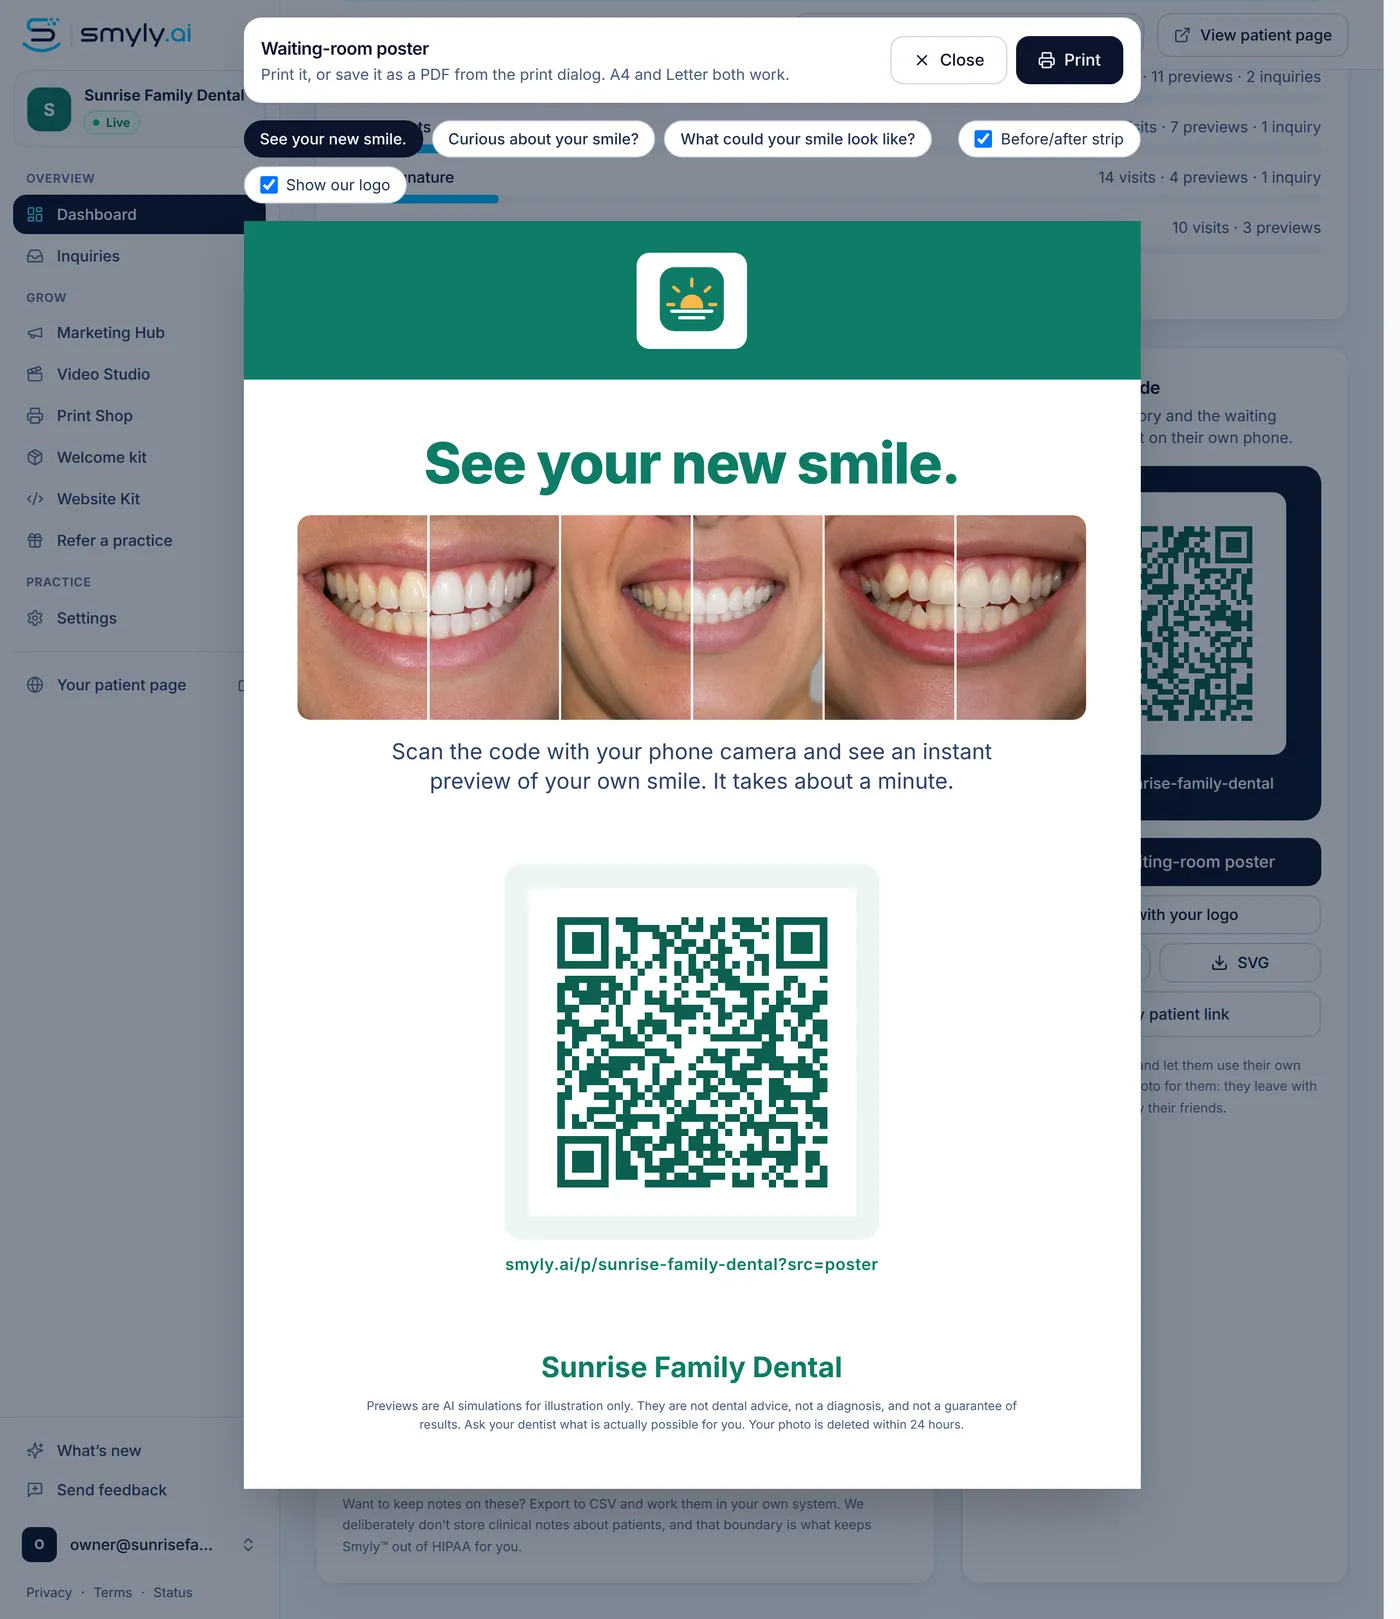
The poster opens ready to print. Pick a headline, such as Curious about your smile?, keep or remove the Before/after strip, and choose whether to show your logo. Then click Print. Letter and A4 both work, and the print dialog can save it as a PDF.
The QR code is printed in a darkened version of your brand color on purpose, so it still scans under dim waiting-room light.
-
Step 3: Hang it where people sit
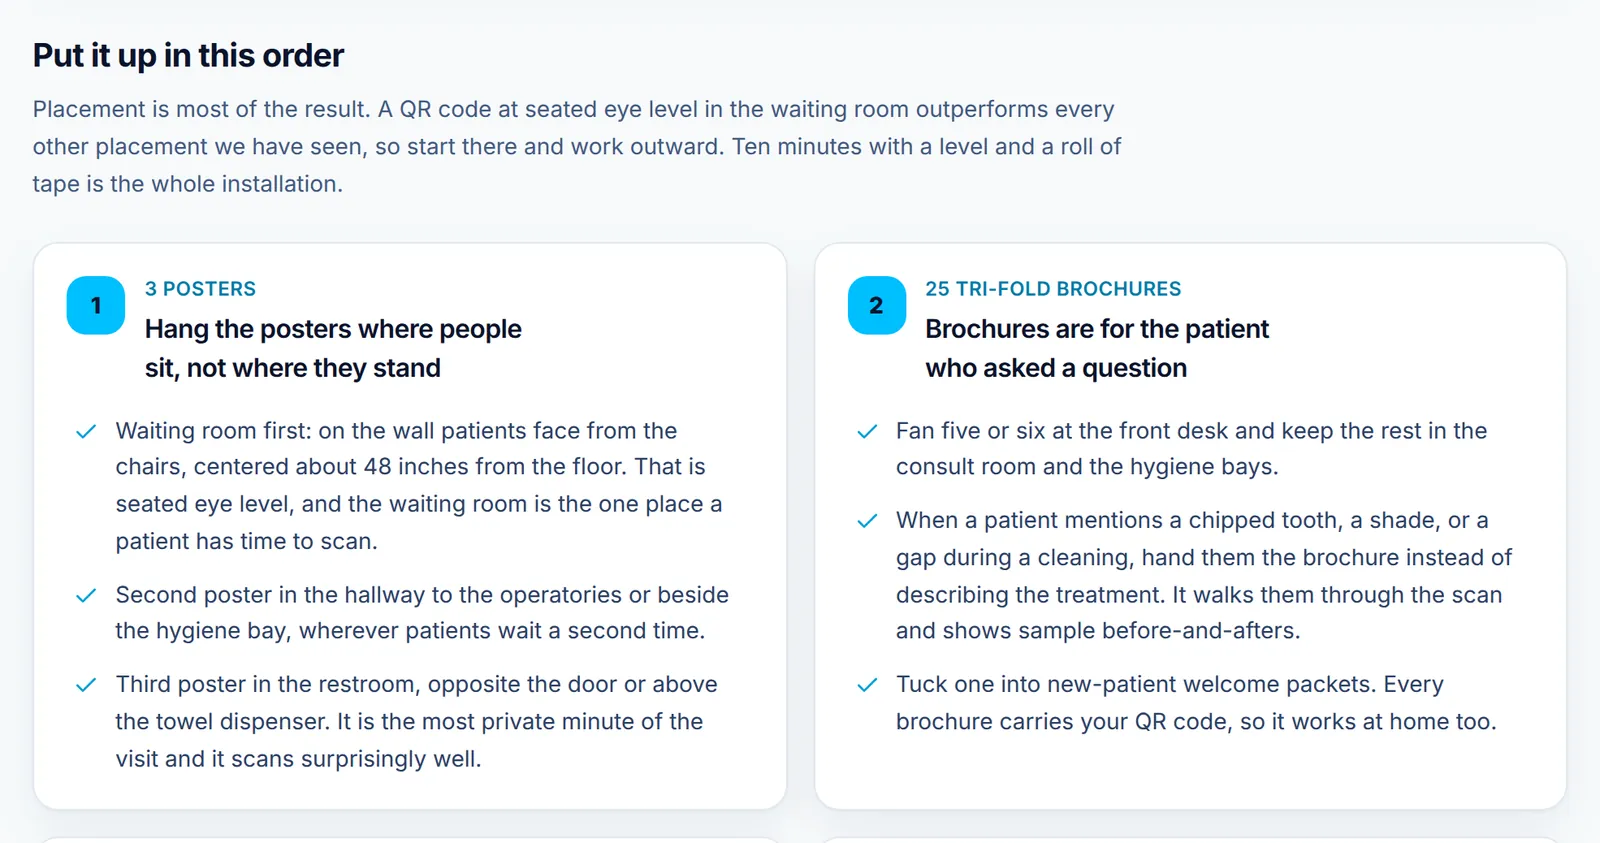
Placement is most of the result. The Welcome kit page lists every piece in the order to put it up, starting with Hang the posters where people sit: on the waiting-room wall patients face from the chairs, centered about 48 inches from the floor. That is seated eye level, and the waiting room is where patients have time to scan.
Put a second poster in the hallway to the operatories or beside the hygiene bay, and a third in the restroom.
-
Step 4: Scan every piece once before it goes up
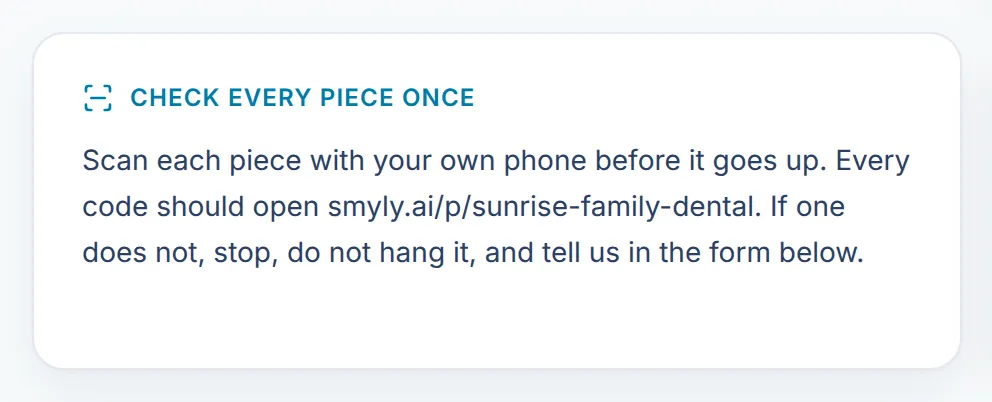
Scan each poster, card and sticker with your own phone before you hang or hand it out. Every code should open your patient page. If one does not, do not hang it, and tell Smyly in the request form on the Welcome kit page.
Then keep the one house rule: patients use their own phones. If someone cannot scan, hand them a QR card to take home.
-
Step 5: Say the ten-second script
Whoever greets the patient says one line at check-in, pointing at the poster:
“While you wait, scan that code and see what your smile could look like. It’s free and takes about a minute.”
It is printed on the staff sheet in your welcome kit, and it is the single biggest driver of previews.
-
Step 6: See which placements bring visits
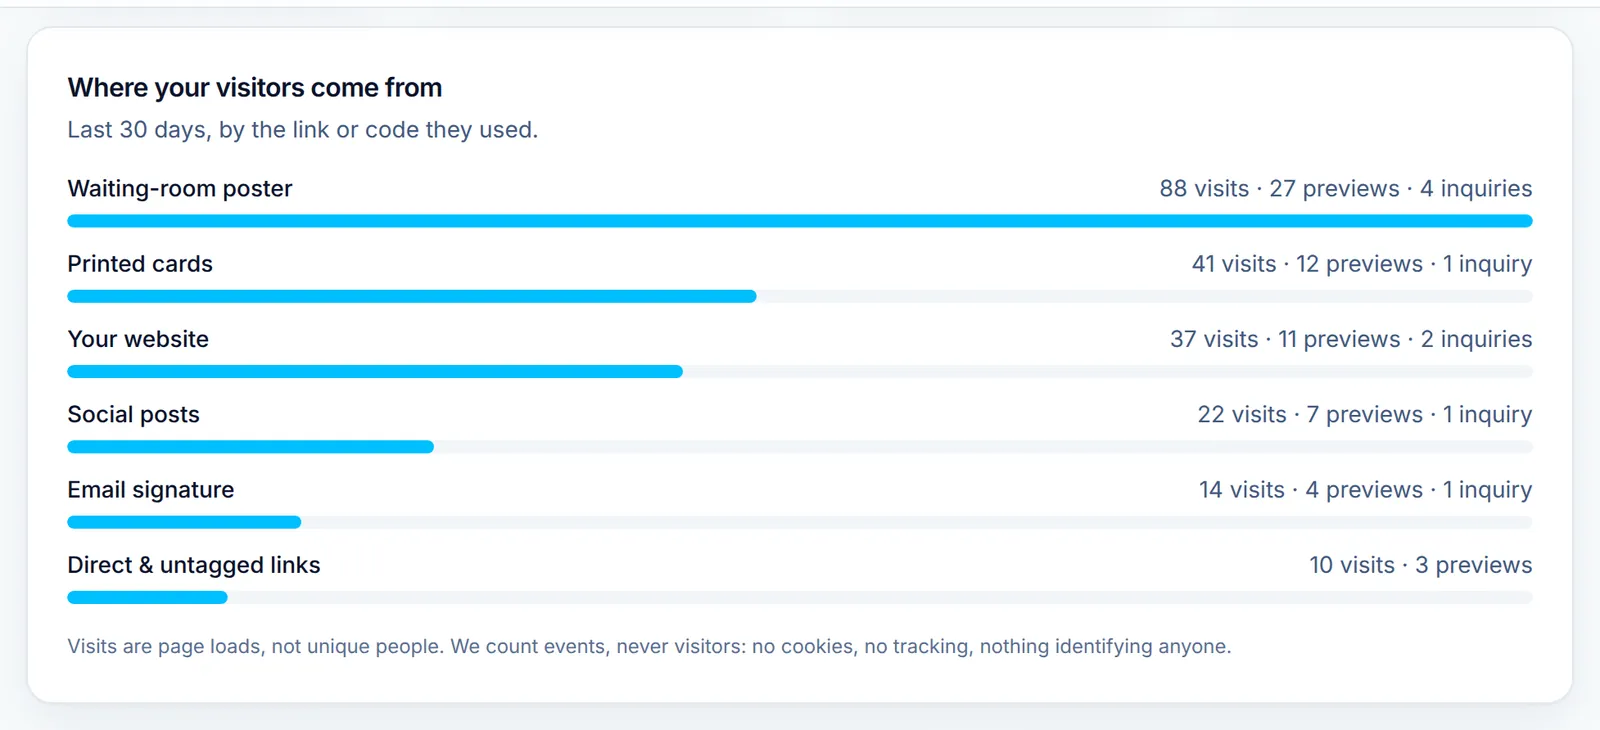
Back on the dashboard, Where your visitors come from shows the last 30 days by the link or code people used: Waiting-room poster, printed cards, your website, social posts, email signatures and more, with the previews and inquiries each one produced.
Counts are page loads, not unique people, and nothing identifies a visitor. If a poster shows few visits, move it before you print more.
Good to know
- Every code you download or print opens the same page. They carry a small tag only so the dashboard can say which surface a visit came from.
- Your printed welcome kit arrives with posters, brochures, a tabletop display, a window cling, QR cards and stickers. The Welcome kit guide covers reorders.
Related guides
-
Order and reprint your welcome kit
See what came in the box, request more printed pieces, or download the print-ready files for your own print vendor.
4 steps · 5 min · 4 screens Read
-
Run your first chairside preview
Walk a patient through a preview on their own phone: scan, consent, pick a treatment, take a photo, and share the result with you.
8 steps · 6 min · 8 screens Read
-
Follow up on patient inquiries
Find the patients who asked you to contact them, move each one from New to Booked, and export the list for your own system.
6 steps · 5 min · 4 screens Read
New to Smyly? See it on your own practice.
Start a 7-day free trial: your branded patient page is live the same day. A card is required at checkout and nothing is charged for 7 days.
Ready to try it?
Everything in this guide is one click from your dashboard. Stuck on a step? Use Send feedback in the app, or email [email protected].
Open your dashboardSomething here doesn’t match what you see? Email [email protected] and we’ll fix the guide.