
What you’ll need
- A work email you can open on this device.
- Your practice website address, so Smyly can pull your brand color (optional).
- A card for checkout. The 7-day trial charges nothing today.
- Your logo as a PNG, JPG or WebP under 1.5 MB, for when you subscribe.
Screens shown with a fictional demo practice and AI-generated model photos.
-
Step 1: Create your account
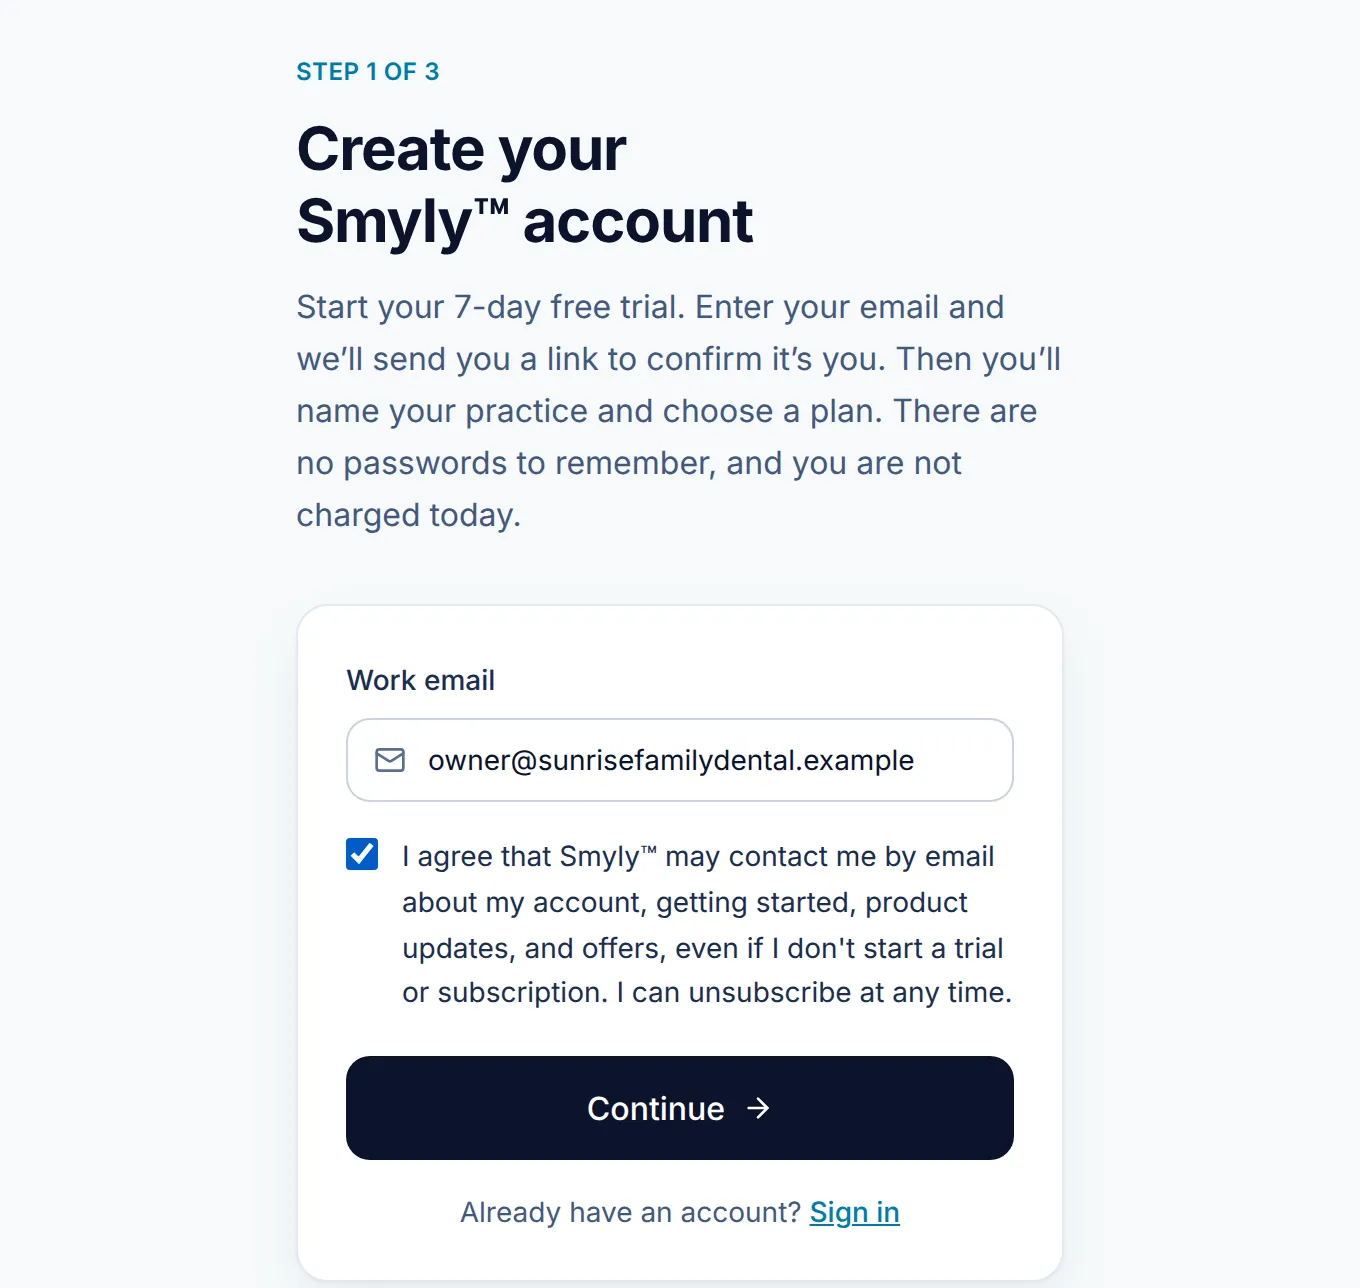
Go to Start free trial. On Create your Smyly account, type your Work email, tick the consent box (Smyly may email you about your account), and click Continue.
There are no passwords anywhere in Smyly. You sign in with a link sent to your email.
-
Step 2: Open the link in your email
Smyly emails you a sign-in link. Open it on the same device and it takes you straight to setting up your practice. Nothing has been charged at this point.
A link works once and lasts 15 minutes. If it has expired, go back to the sign-up page and ask for a fresh one.
-
Step 3: Name your practice and claim your patient link
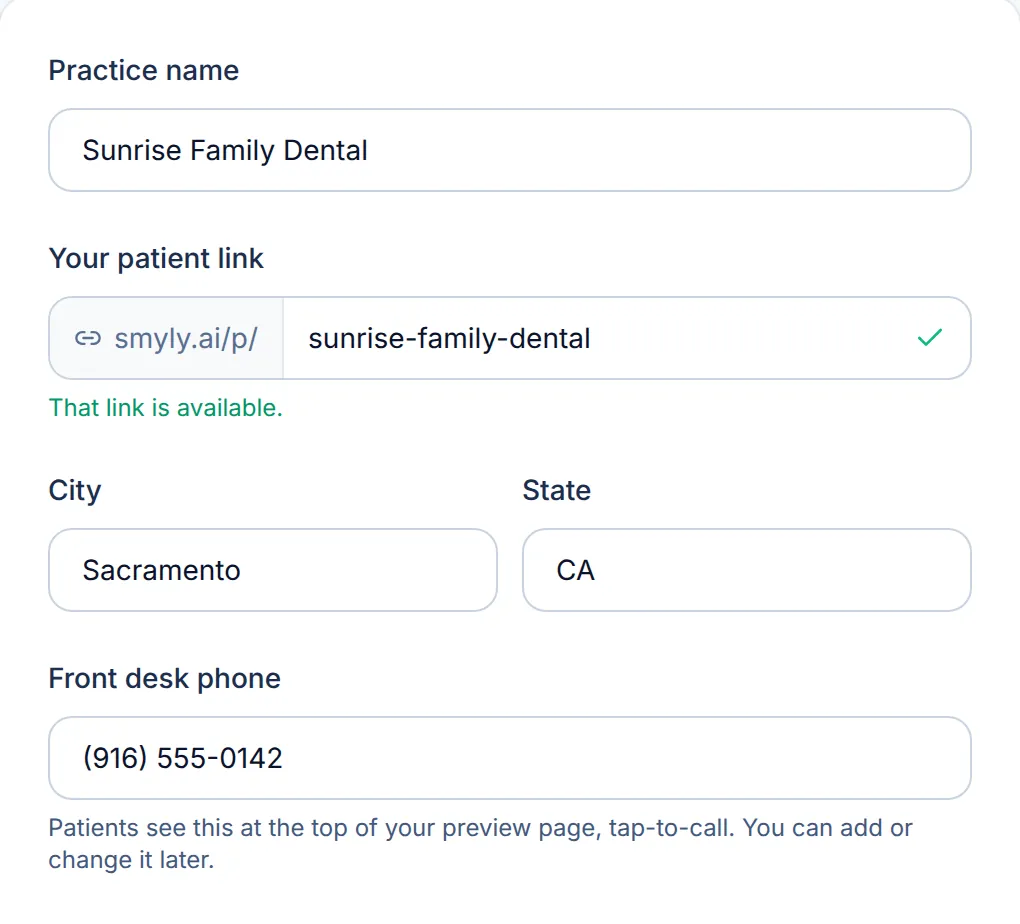
On Let’s get your practice live, type your Practice name. Smyly fills in Your patient link from it (smyly.ai/p/your-practice) and checks that it is free. Edit it until it says That link is available. Keep it short: it is the address inside every QR code you print.
Add your city and state, and your Front desk phone. Patients see the phone number at the top of your preview page as a tap-to-call button.
-
Step 4: Choose your treatment menus and brand color
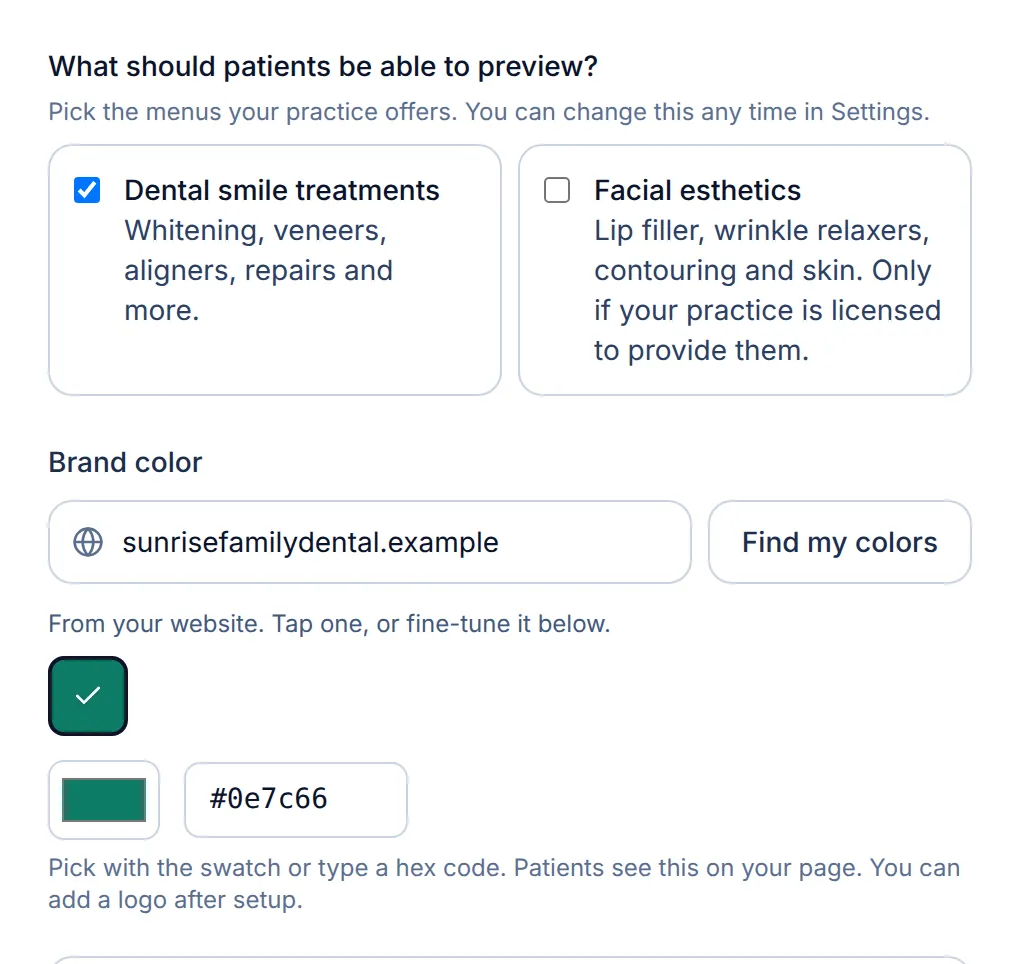
Under What should patients be able to preview?, keep Dental smile treatments ticked if you are a dental practice. Tick Facial esthetics only if your practice is licensed to provide lip filler, wrinkle relaxers, contouring and skin treatments.
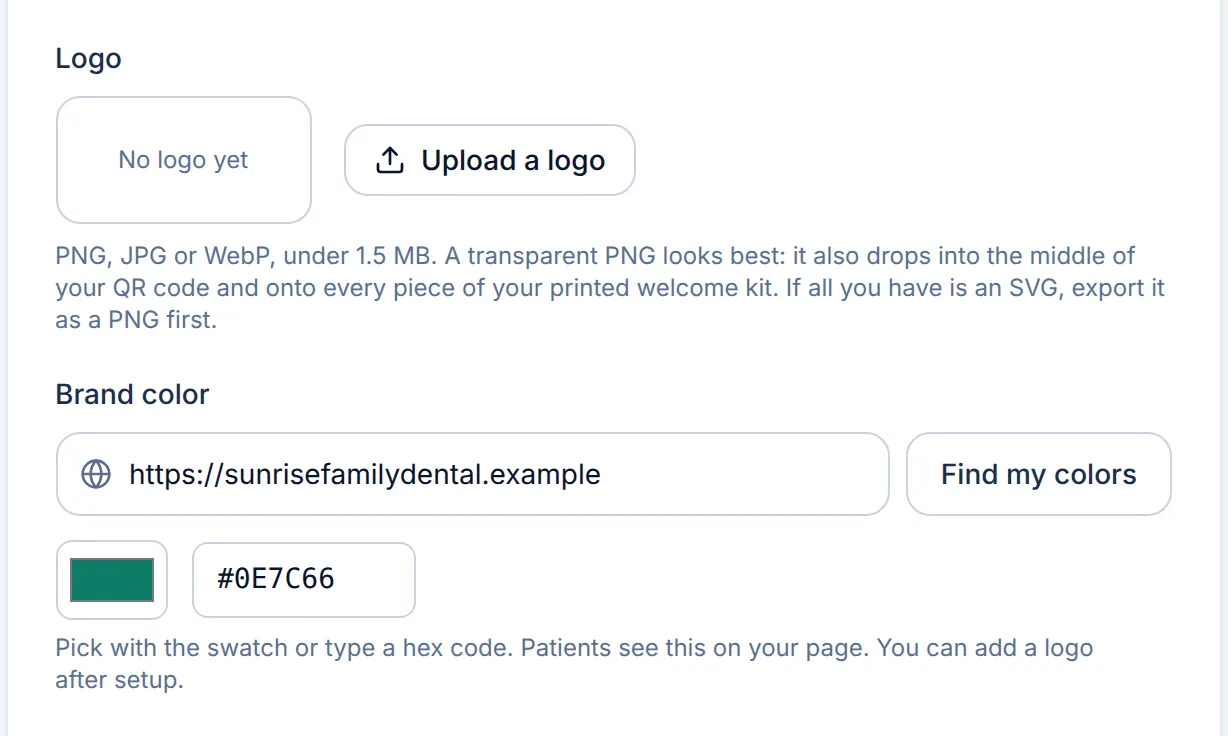
For your brand color, type your website address and click Find my colors. Tap a suggested color swatch, or pick a color yourself and fine-tune the hex code. Your patient page, posters and QR codes all use it.
The optional Add your links now section takes your booking, Google review, Instagram and Facebook links. They power your appointment button, review flyers and email signatures, and you can add them later too.
-
Step 5: Read and accept the two agreements
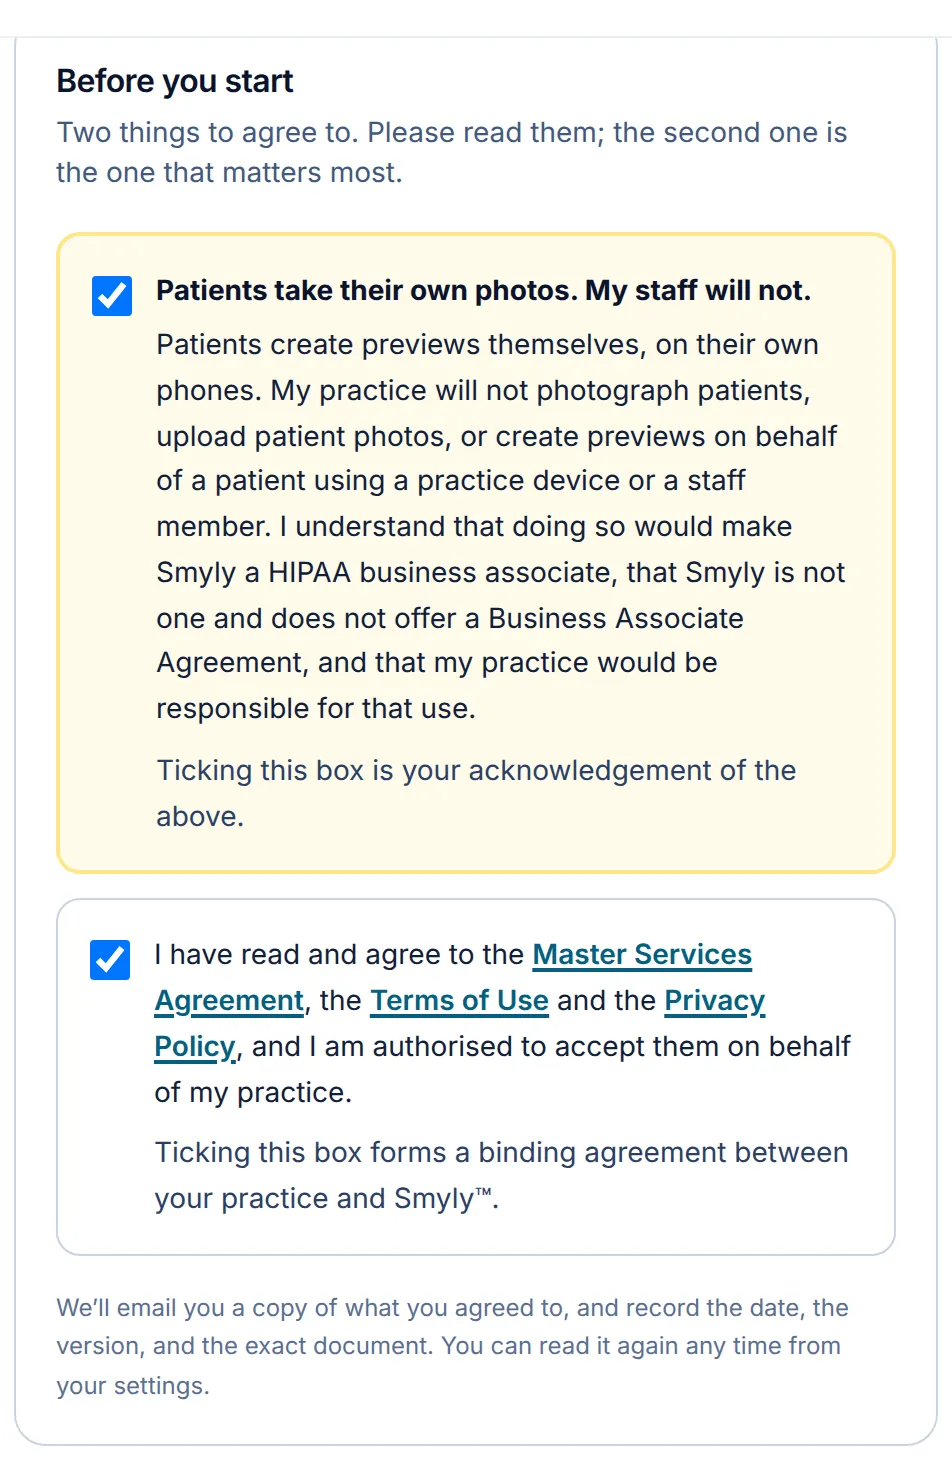
Under Before you start, read and tick both boxes. The first, Patients take their own photos. My staff will not., is the one that matters most: patients always create previews on their own phones, never on an office device or by a staff member.
The second confirms you agree to the Master Services Agreement, the Terms of Use and the Privacy Policy on behalf of your practice. Smyly emails you a copy, and you can read it again any time in Settings.
-
Step 6: Pick a trial or subscribe, then check out
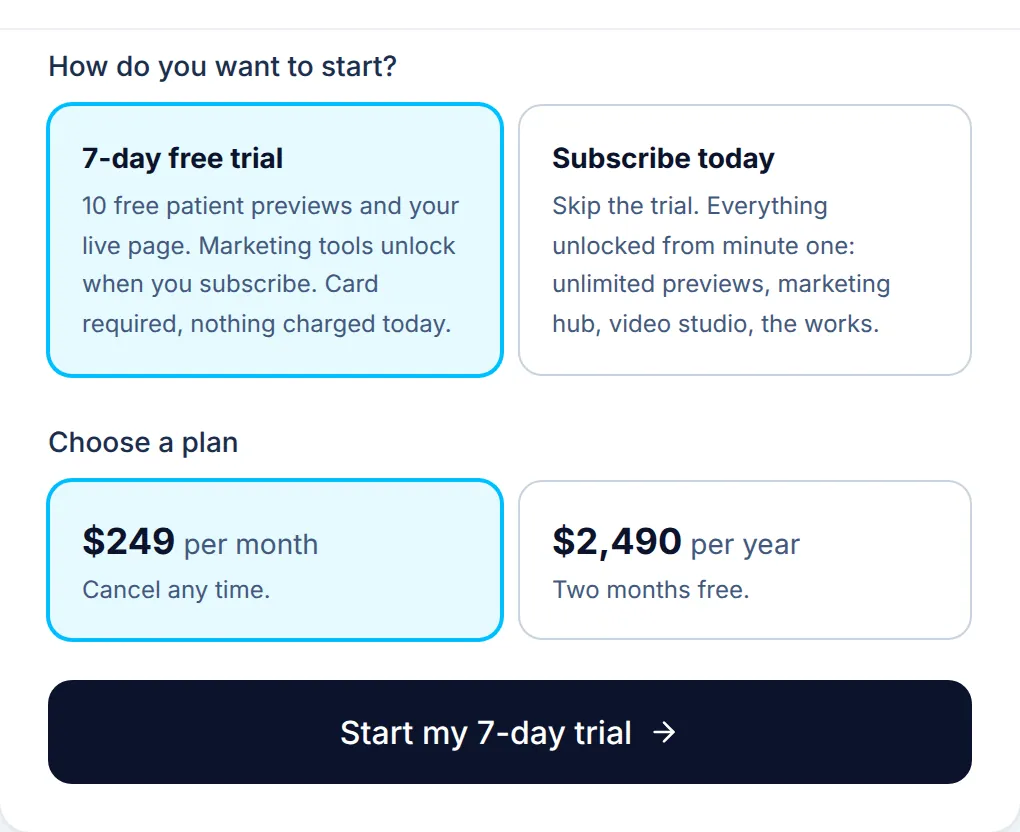
Under How do you want to start?, choose the 7-day free trial (10 free patient previews and your live page; the Marketing Hub and Settings unlock when you subscribe) or Subscribe today to unlock everything now.
Choose a plan, $249 per month or $2,490 per year, and click Start my 7-day trial (or Subscribe and go live). Stripe asks for a card. On the trial you are not charged today, and you can cancel before day 7 and pay nothing.
-
Step 7: Add your logo when you subscribe
During the trial your practice runs on the details you gave at signup, and Settings shows a Settings unlock with your subscription screen. Once you subscribe, open Settings, click Upload a logo and choose a PNG, JPG or WebP under 1.5 MB. A transparent PNG looks best.
You can change your Brand color, name, city, website and phone on the same card. Click Save changes and your patient page, QR codes and printed kit files use the new details.
Good to know
- Your patient link cannot be changed in Settings later, because a new link would break every QR code you have printed. If you really need one, email [email protected].
- If checkout does not open, your practice is still saved. Your dashboard says “You’re not live yet” and gives you the plan buttons again.
Related guides
-
Put your QR code where patients scan it
Print the waiting-room poster from your dashboard, hang it at seated eye level, and see which printed pieces bring in visits.
6 steps · 8 min · 5 screens Read
-
Run your first chairside preview
Walk a patient through a preview on their own phone: scan, consent, pick a treatment, take a photo, and share the result with you.
8 steps · 6 min · 8 screens Read
-
Choose which treatments patients can preview
Turn the dental and facial esthetics menus on or off for your patient page, and see what patients get with each.
4 steps · 3 min · 3 screens Read
New to Smyly? See it on your own practice.
Start a 7-day free trial: your branded patient page is live the same day. A card is required at checkout and nothing is charged for 7 days.
Ready to try it?
Everything in this guide is one click from your dashboard. Stuck on a step? Use Send feedback in the app, or email [email protected].
Open your dashboardSomething here doesn’t match what you see? Email [email protected] and we’ll fix the guide.