
What you’ll need
- Your QR poster, a QR card, or your patient link.
- The patient’s own phone. Staff never take or upload the photo.
Screens shown with a fictional demo practice and AI-generated model photos.
-
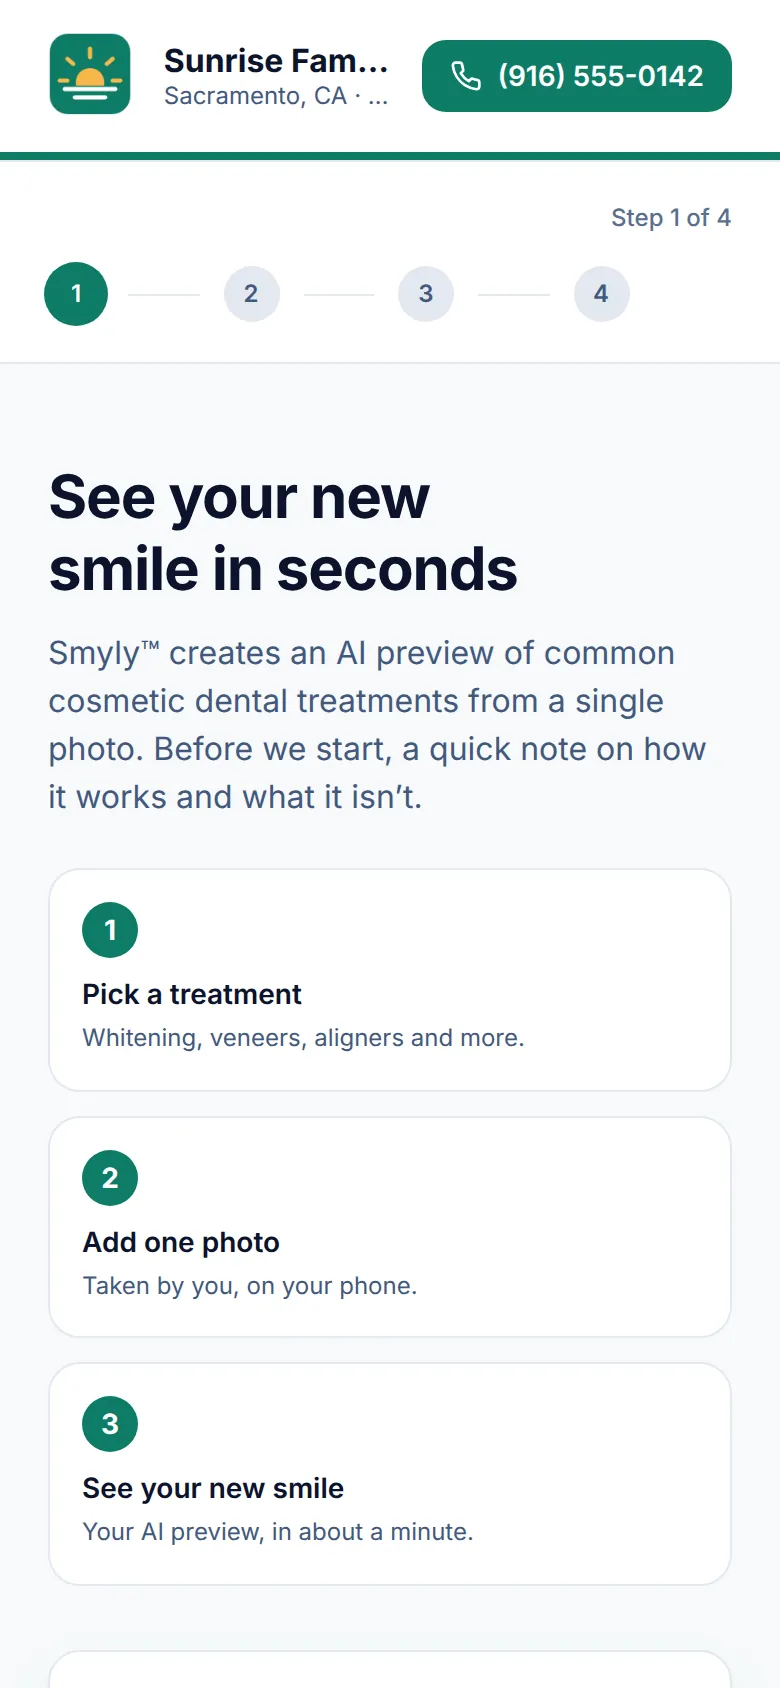
Step 1: The patient scans your code
The patient points their phone camera at your poster or card. Your patient page opens under your logo and name, with your front desk phone as a tap-to-call button, and explains the three steps: pick a treatment, add one photo, see the new smile.
-
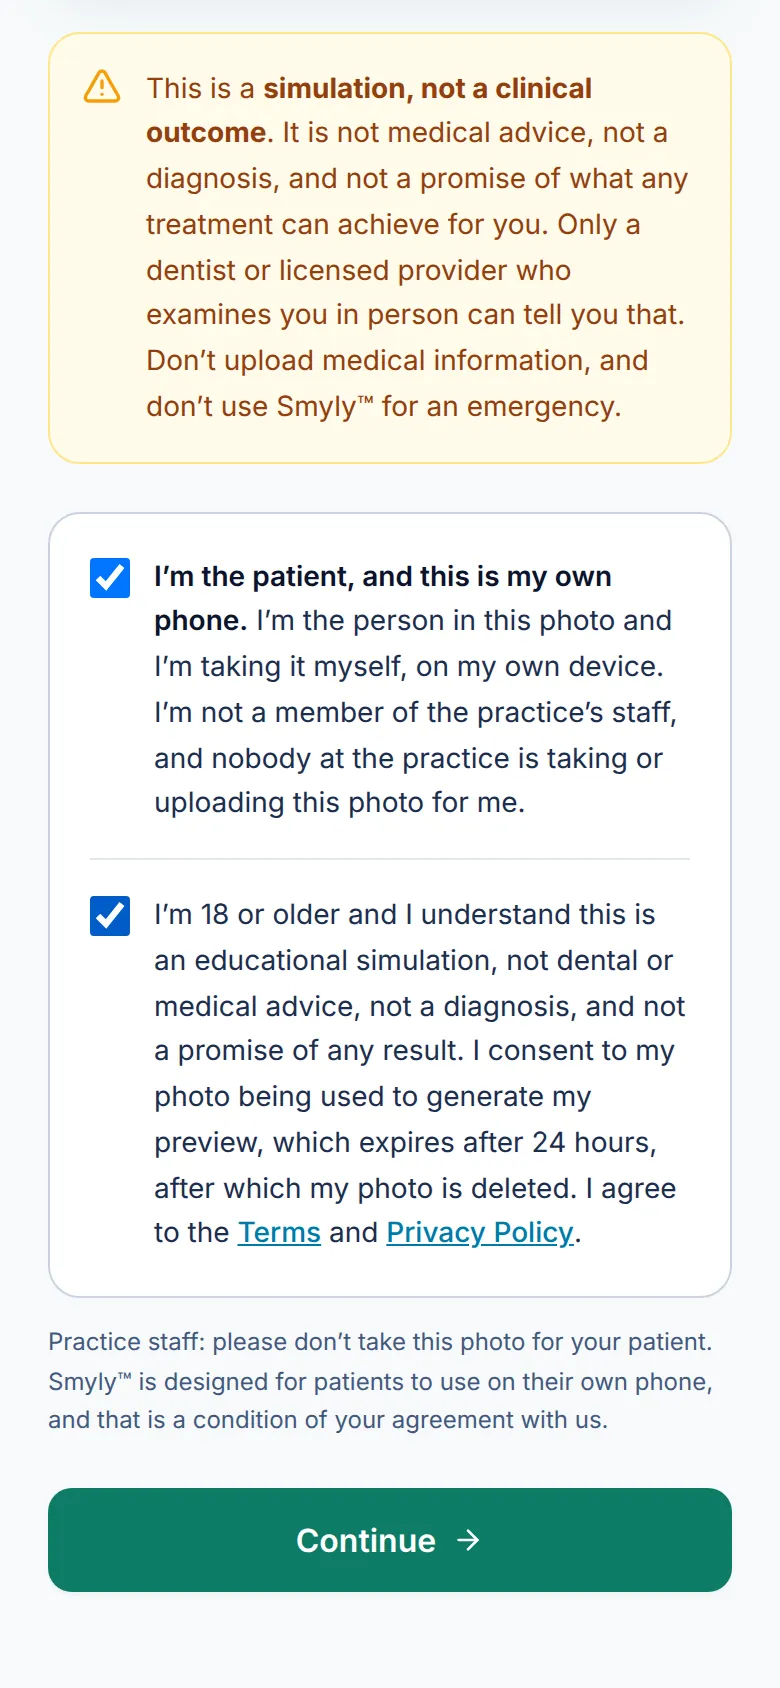
Step 2: They confirm it is their phone and their photo
Two boxes, both required. The first says I’m the patient, and this is my own phone. The second confirms they are 18 or older, that this is a simulation and not dental advice, and that their photo is deleted after 24 hours. Then they tap Continue.
This is why staff should never hold the phone: the patient is stating that they took the photo themselves.
-
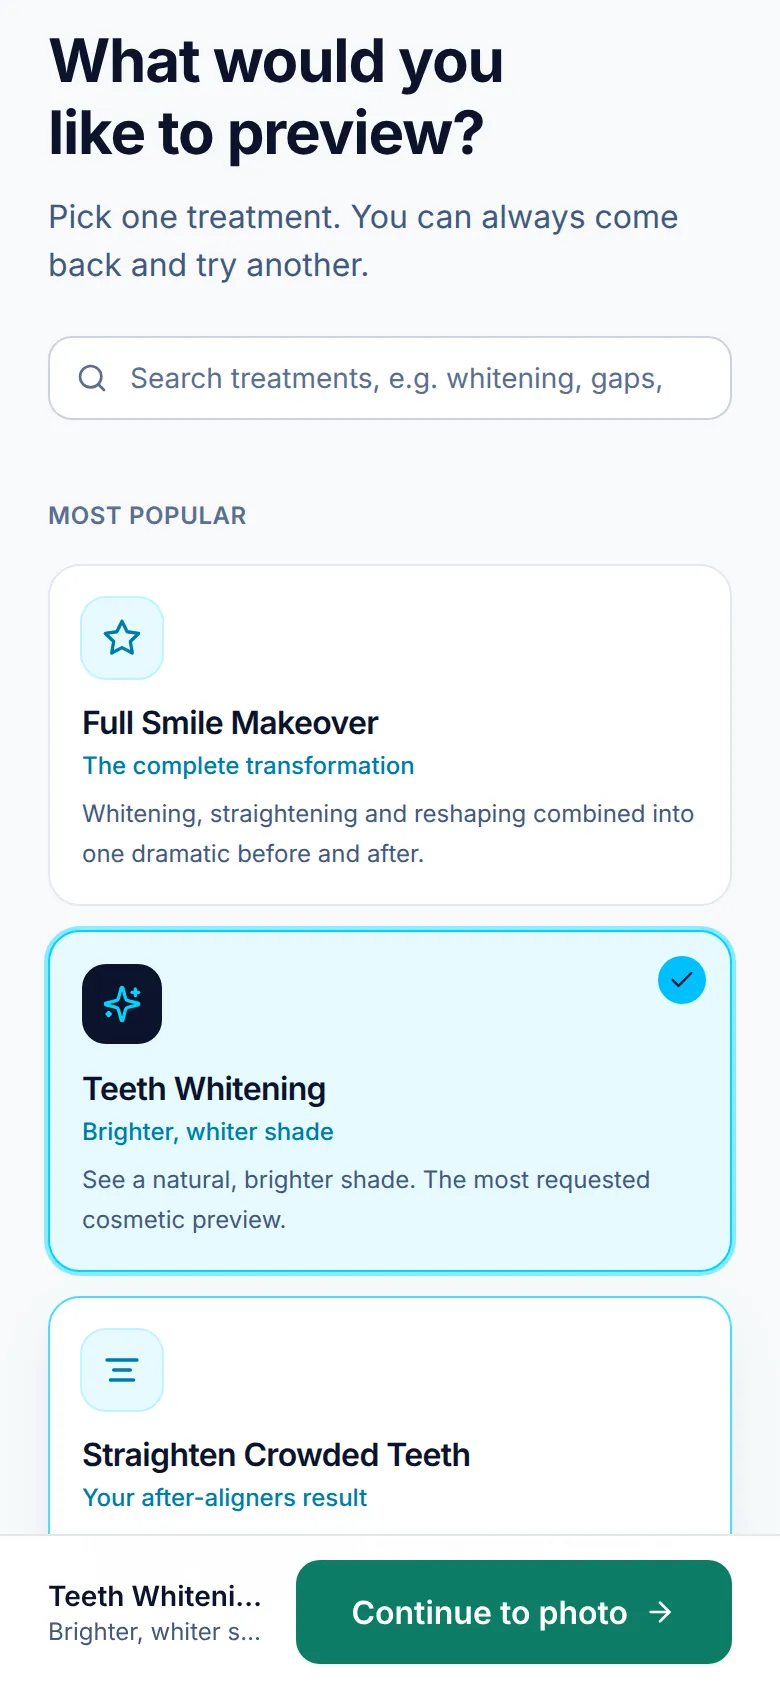
Step 3: They pick a treatment
On What would you like to preview? they search, or tap a card under Most popular or a category, for example Teeth Whitening. Some treatments add a few fine-tune choices. Then they tap Continue to photo in the bar at the bottom.
-
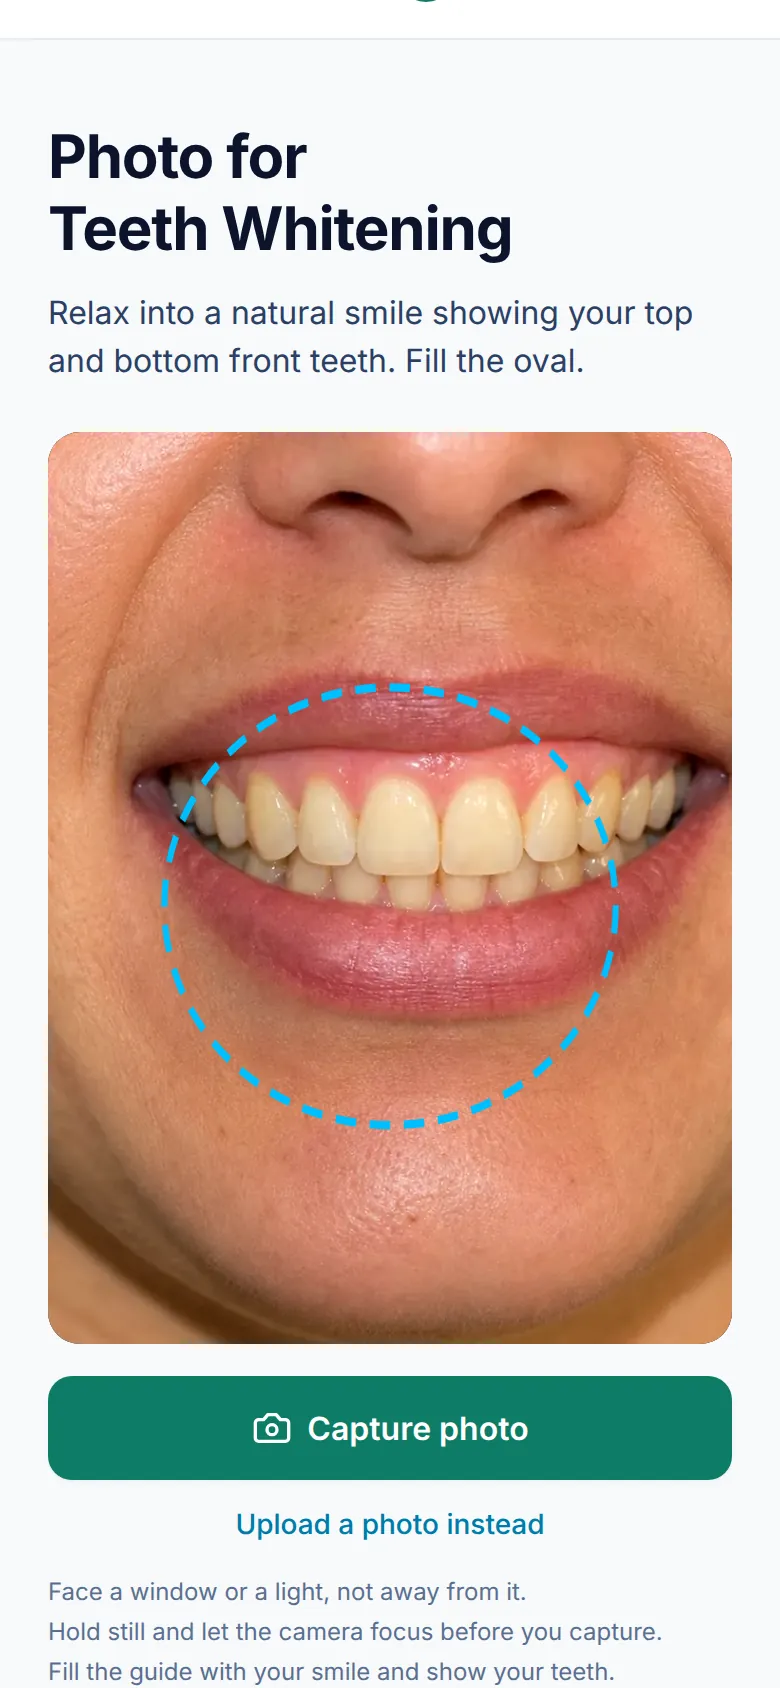
Step 4: They take a selfie inside the guide
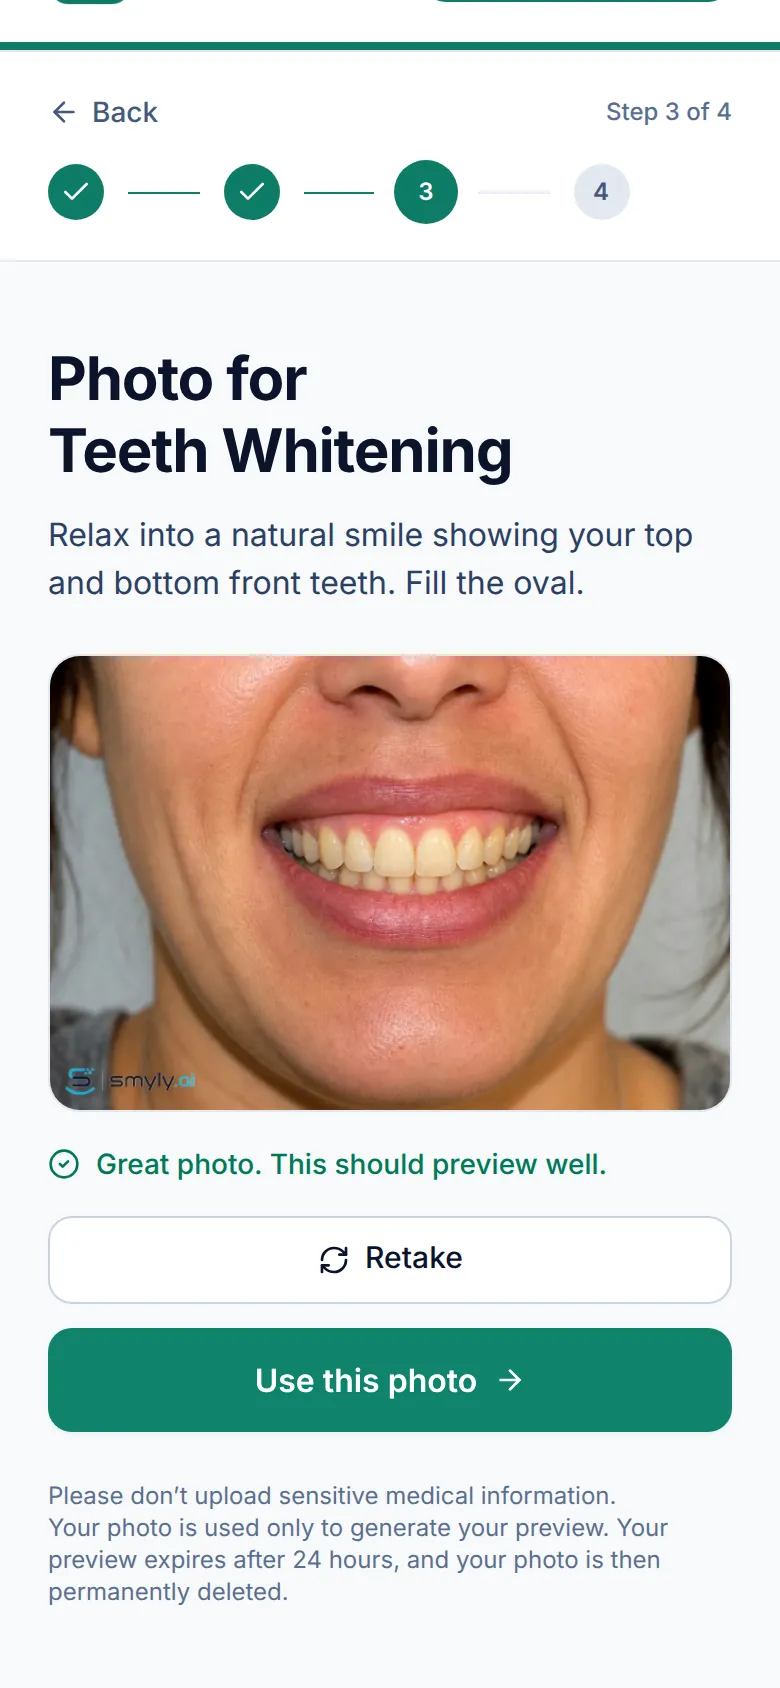
The front camera opens with a dashed oval. They relax into a natural smile that shows their top and bottom front teeth, fill the oval, face a window or a light, and tap Capture photo.
If the camera is blocked, Upload a photo instead opens their photo library.
-
Step 5: They check the photo
-
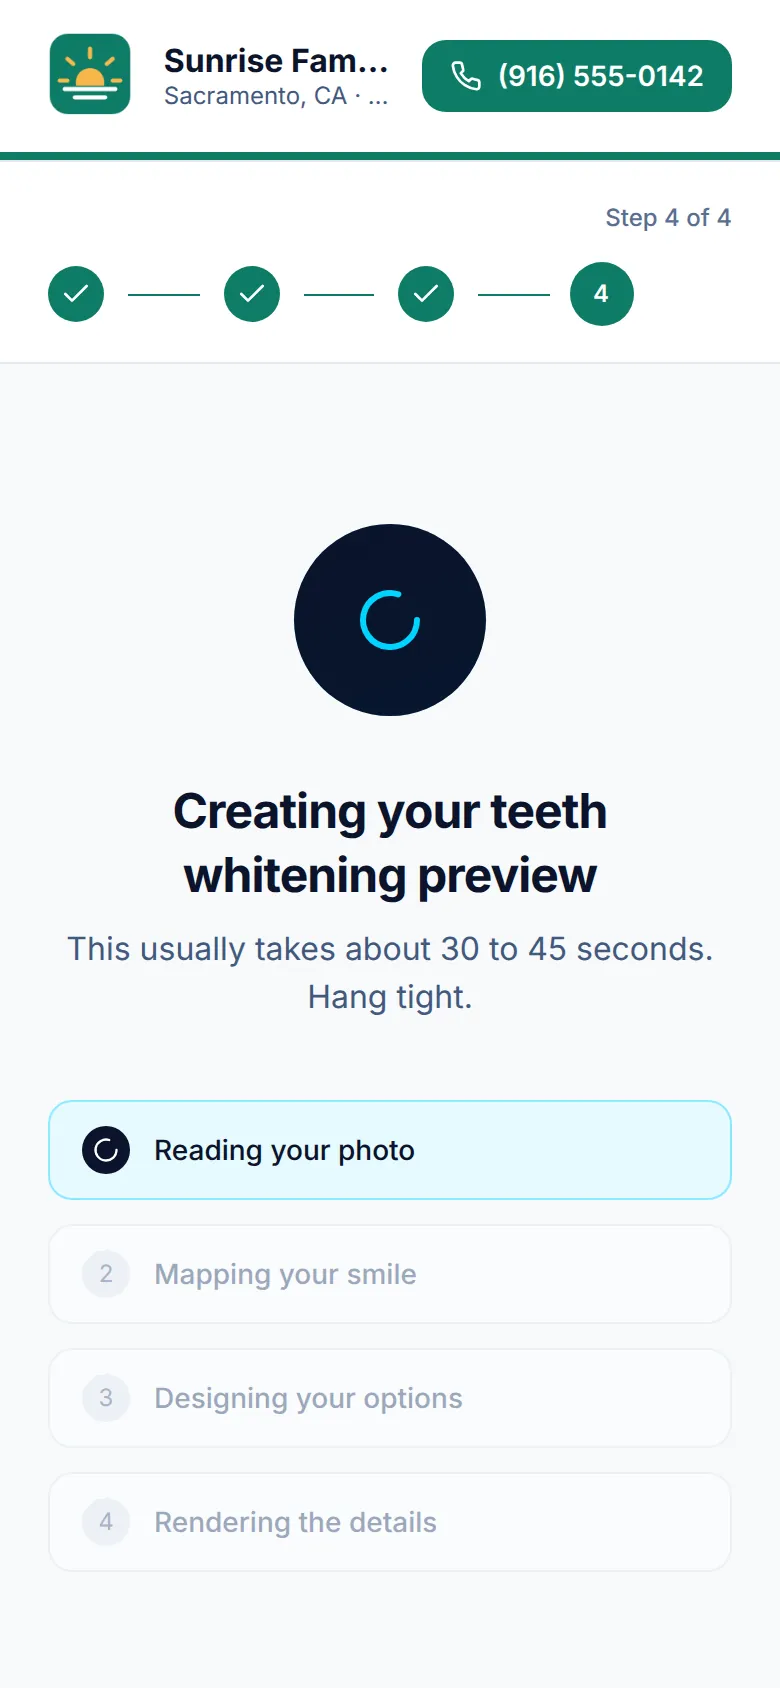
Step 6: Smyly builds the preview
-
Step 7: They compare before and after
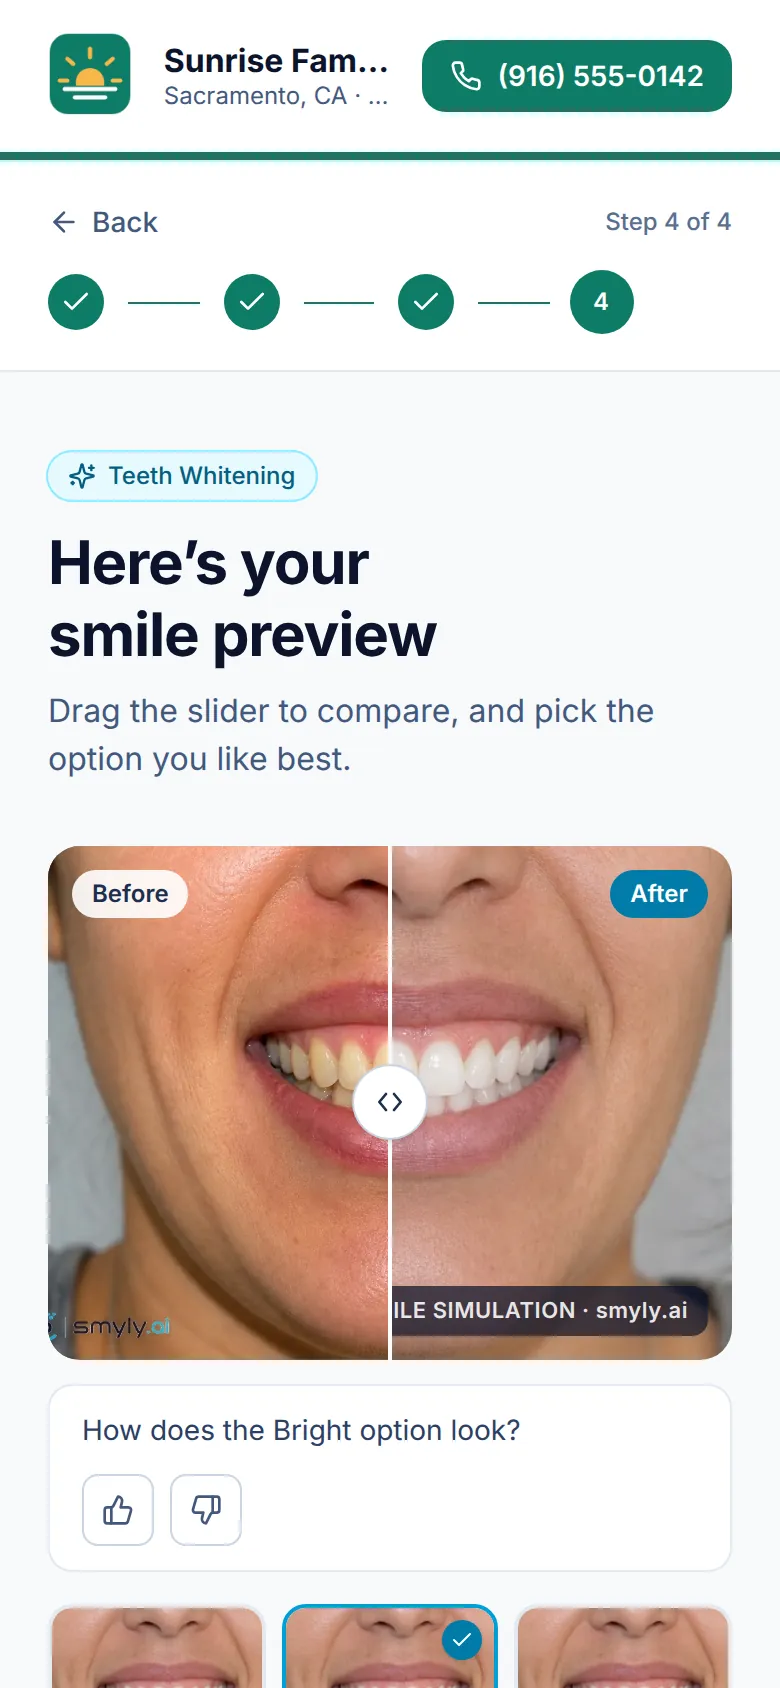
On Here’s your smile preview they drag the before and after slider and tap between the options (for whitening: Natural, Bright and Hollywood). Thumbs up or down tells Smyly how the preview looks.
Try another treatment reuses the same photo, so a second preview takes seconds. Regenerate this preview runs the same treatment again.
-
Step 8: They show you with a share code
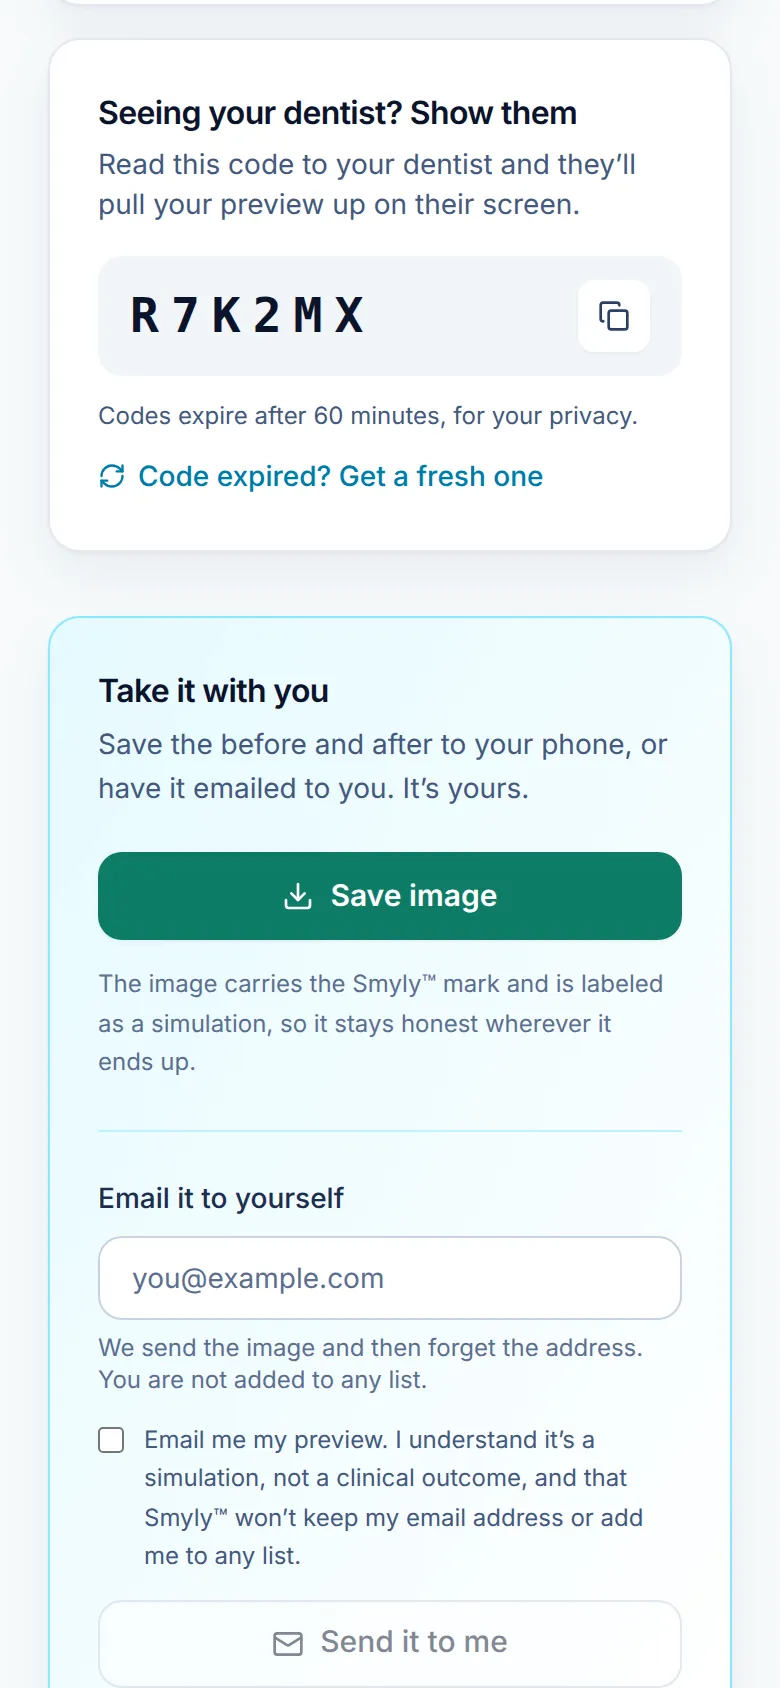
Under Seeing your dentist? Show them, the patient reads you the six-character share code. You type it on any office computer to see the preview (see Open a patient’s preview with a share code). Codes expire after 60 minutes; Code expired? Get a fresh one makes a new code for the same preview.
Just above, Like it? Talk to your practice lets the patient ask you to contact them, which lands in your inquiries.
Good to know
- The patient’s photo is deleted within 24 hours, and they can tap Delete my photo now on the results page to do it immediately. Your practice never receives the photo.
- On the 7-day trial your page includes 10 free patient previews. The meter is on your dashboard.
Related guides
-
Open a patient’s preview with a share code
Type the six-character code a patient reads to you and see their preview on your screen, chairside.
6 steps · 3 min · 4 screens Read
-
Follow up on patient inquiries
Find the patients who asked you to contact them, move each one from New to Booked, and export the list for your own system.
6 steps · 5 min · 4 screens Read
-
Choose which treatments patients can preview
Turn the dental and facial esthetics menus on or off for your patient page, and see what patients get with each.
4 steps · 3 min · 3 screens Read
New to Smyly? See it on your own practice.
Start a 7-day free trial: your branded patient page is live the same day. A card is required at checkout and nothing is charged for 7 days.
Ready to try it?
Everything in this guide is one click from your dashboard. Stuck on a step? Use Send feedback in the app, or email [email protected].
Open your dashboardSomething here doesn’t match what you see? Email [email protected] and we’ll fix the guide.