
What you’ll need
- Chrome, Edge, Safari 16.4 or later, or Firefox 130 or later to render the MP4.
Screens shown with a fictional demo practice and AI-generated model photos.
-
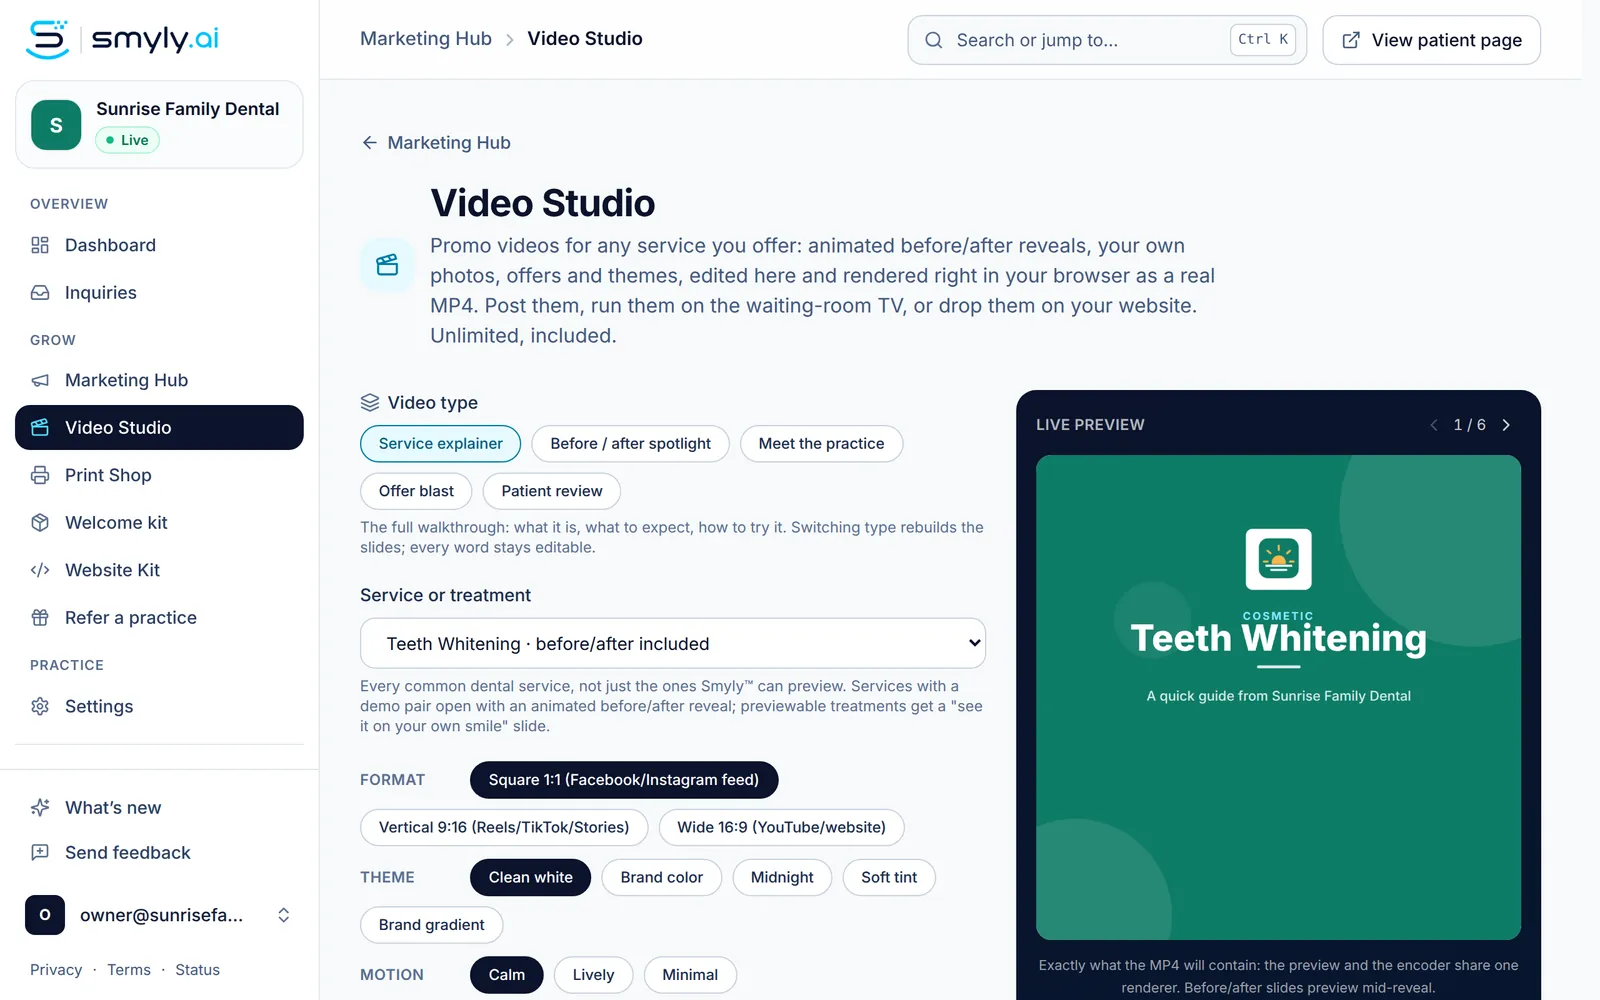
Step 1: Pick a video type and a service
Click Video Studio in the sidebar. Choose a Video type: Service explainer, Before / after spotlight, Meet the practice, Offer blast or Patient review. Then pick the Service or treatment. Every common dental service is in the list, and the ones marked “before/after included” open with an animated reveal.
The live preview on the right shows each slide as you work.
-
Step 2: Set the format and style
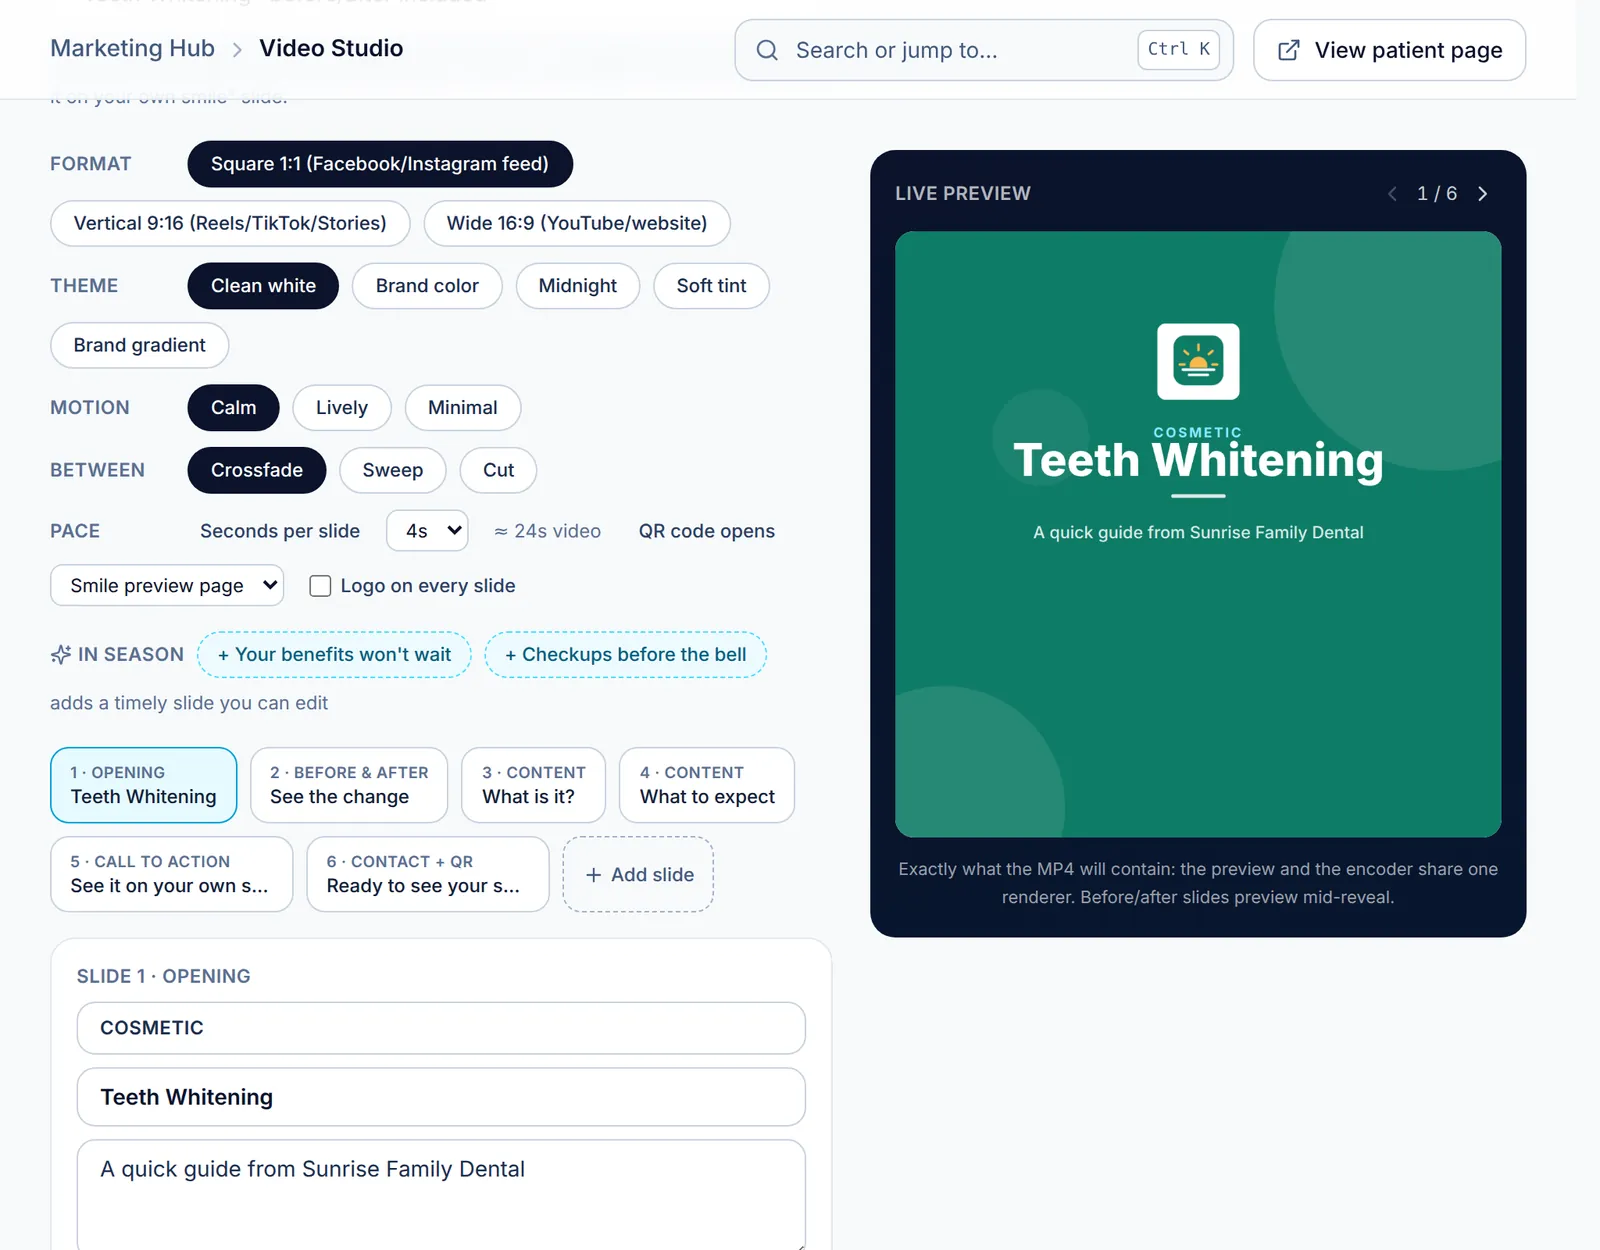
Pick the Format: Square 1:1 for Facebook and Instagram feeds, Vertical 9:16 for Reels, TikTok and Stories, or Wide 16:9 for YouTube and your website. Choose a Theme, a motion style and the transition between slides, and set Seconds per slide.
You can also choose what the QR code opens and whether your logo appears on every slide.
-
Step 3: Edit the slides
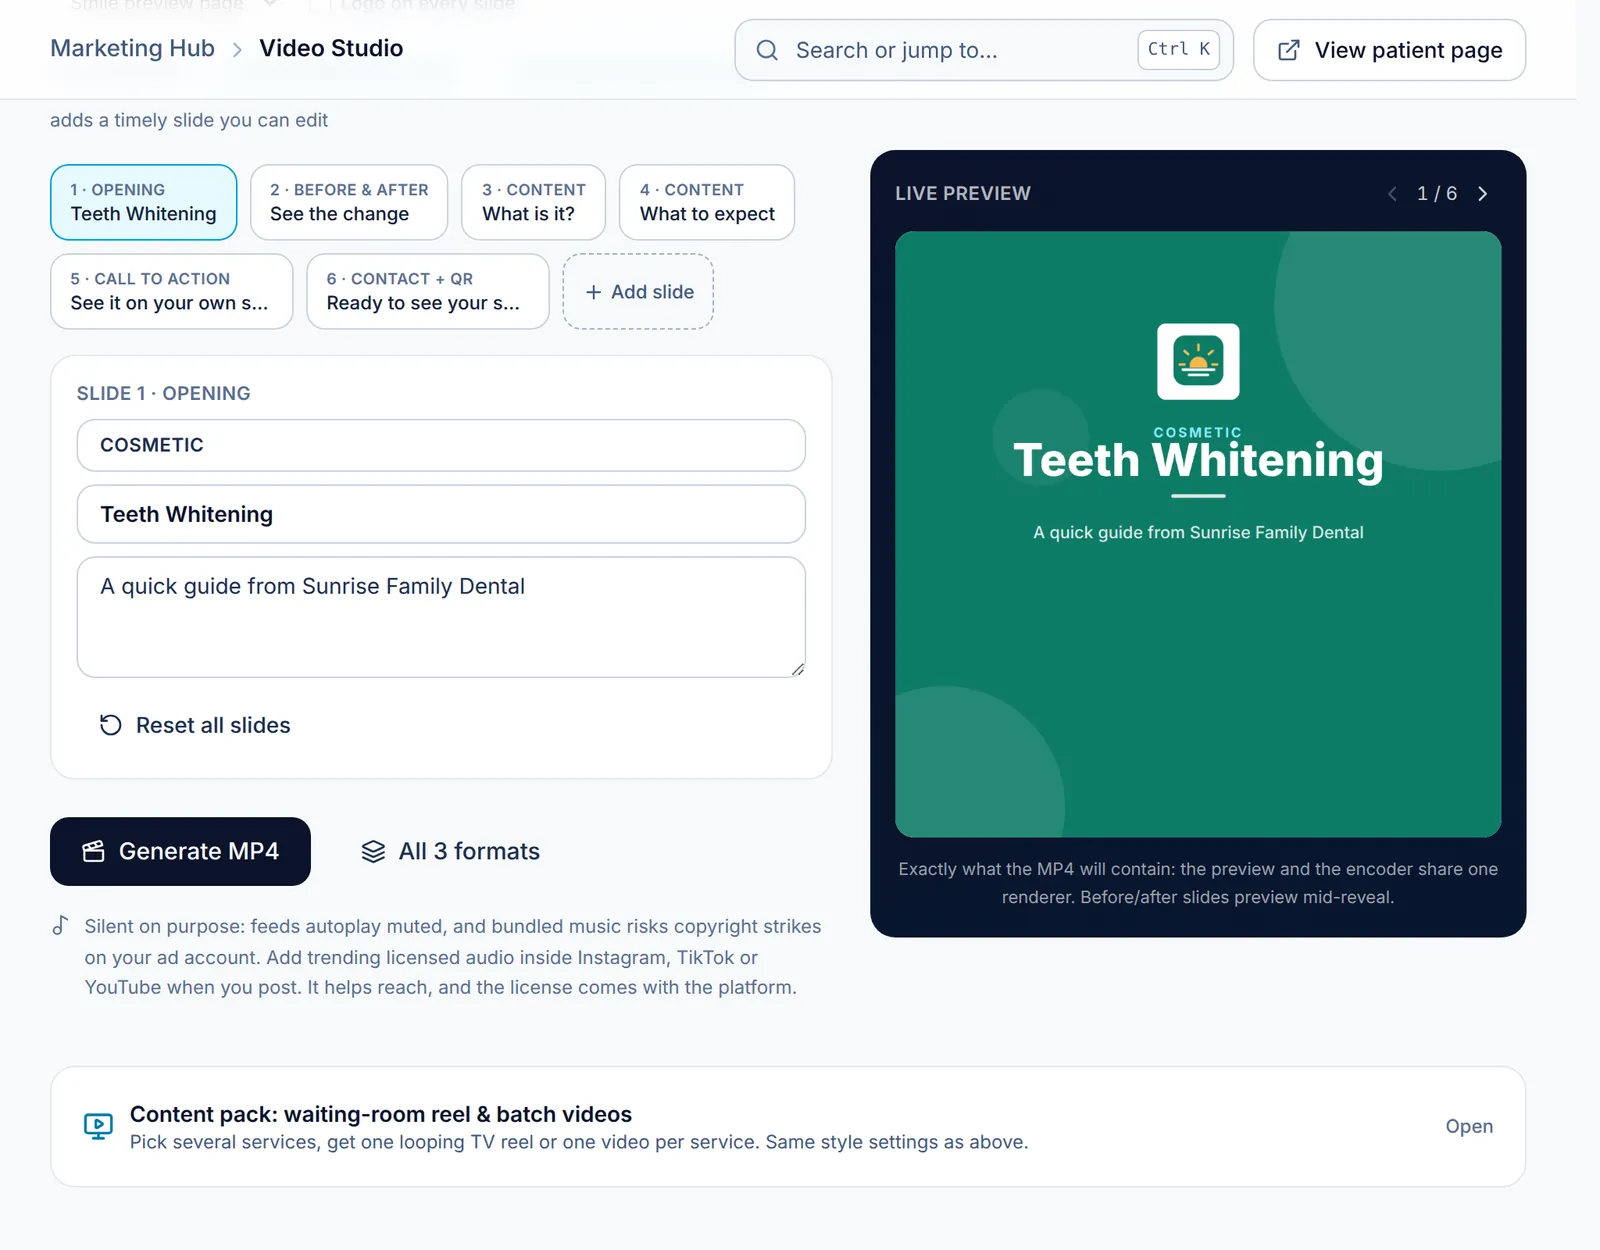
The slide tabs list every slide in order. Select one to edit its kicker, Slide heading and text, move it earlier or later, or add a slide. Use Next slide above the preview to step through. In season suggestions add a timely slide, and Reset all slides starts over.
The last slide adds your phone, website, QR code and the required “not dental advice” line by itself.
-
Step 4: Render and download
Click Generate MP4. The video renders in your browser, with a progress bar, then Download MP4 appears. All 3 formats renders the feed, Reels and wide versions back to back.
The Post kit under the video is a ready caption with your tracked link and hashtags; click Copy and paste it into your post.
Good to know
- Videos are silent on purpose: feeds autoplay muted, and bundled music risks copyright strikes. Add licensed audio inside Instagram, TikTok or YouTube when you post.
- Use the Patient review type only with a review you have permission to share.
Related guides
-
Create social posts in your brand
Connect your profiles, print a follow-us flyer, and generate post images that send people to your smile preview page.
4 steps · 5 min · 2 screens Read
-
Add Smyly to your website
Paste one of the Website Kit embeds, from the full try-on widget to a single button, so site visitors can preview their own smile.
4 steps · 7 min · 3 screens Read
-
Brand your team’s email signature
Build a signature with your logo, booking button and legal footer in four steps, paste it into your mail app, and share the design with your team.
5 steps · 6 min · 4 screens Read
New to Smyly? See it on your own practice.
Start a 7-day free trial: your branded patient page is live the same day. A card is required at checkout and nothing is charged for 7 days.
Ready to try it?
Everything in this guide is one click from your dashboard. Stuck on a step? Use Send feedback in the app, or email [email protected].
Open your dashboardSomething here doesn’t match what you see? Email [email protected] and we’ll fix the guide.